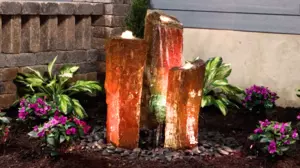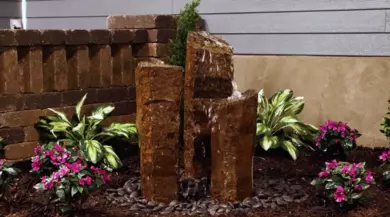
How to install the 3 Piece Natural Basalt Kit
Items needed
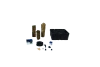


Tools needed
Wheelbarrow
Shovel
Tamper
4' level
Tubing cutters or PVC saw
Screw driver or nut driver
Step-by-Step Guide
Create a water feature with ease using the 3 Piece Natural Basalt Kit. Basalt Kits have everything included to create a working water feature with natural stone with minimal time and effort. With two people, this kit should take less than two hours to install. We'll show you how to complete this water feature, step by step: excavating, installing the basin, installing the plumbing and adjusting the columns.

1. Excavating & installing the basin
After selecting the site, excavate a five foot diameter circle about 18″ deep, leaving the soil evenly spread around the perimeter. Level and tamp the bottom of the hole. Place the Fountain Basin in the hole orienting the pump chamber towards the electric supply.
Please note: you will need to provide 115V service for the pump and optional lights within ten feet of the Basin. Check that the Basin is level.
The matched Fountain Basin, Pump, and plumbing kit make installing the triple basalt columns easy. To make it even easier, remove the basin to install the pump and diverter before setting it in the hole.
2. Installing the plumbing
Following the provided diagram, thread the male adapter into the top of the pump, glue the street 90 into the male adapter and the close nipple into the other side of 90. Glue the 45 degree elbow to the nipple, then loosely fit the rubber coupling over the 45. Insert the 3-Way Diverter into the hole on the side of the pump chamber, then tighten the rubber coupling around the 3-Way Valve and the 45 elbow to complete the pump installation
If you desire, it’s easiest to install the Automatic Fill Valve now also (Not Included). Drill a 7/8″ hole on the outside wall between the pump chamber and the conduit chases and install the valve following the included directions.
Replace the basin in the excavation and check again that it is level in all directions. Connect the Autofill, then backfill and lightly step the soil in around the edges.

3.a. Installing the columns
It doesn’t matter which columns you use where, but it is easiest to plumb the longest, outside tubing run first, then the middle, then the short inside run. Figure out which column you are setting to the right of the pump chamber, where the longest run of tubing will end.

3.b. Installing the columns
Move the column to the top of the basin, aligning the hole in the bottom with the plumbing channel. Carefully, lean the column over and set it on its side with the bottom of the basin still lined up with the channel. Push one end of the kink-free tubing up into the column from the bottom out the top.
To keep the water from running back down the bore alongside the tubing, instead out of the top of the column, you will need to apply putty to the tubing at the top of the column. Sealing around the tubing keeps all the water bubbling out the top of the column and keeps water from freezing and expanding inside the column, potentially damaging the column in a cold snap.
Then run the tubing back along the outside channel to the 3-Way Diverter. Set the column upright so that the tubing sits in the plumbing chase. Cut the tubing and slip it on the barbed outlet of the outside valve.
Repeat for the other two columns.
4. Adjust the water flow
When all three columns are connected, open all three valves on the 3-Way Diverter, fill the basin and plug in the pump. Adjust the valves as needed to balance the flow starting with the shortest column, then the middle, finally the tallest. Remove the valve handles and store, then cover the basin with the 0.75” or larger gravel of your choice.

5.a. Optional: Install lighting
Columns can be lit two different ways – from the inside and from the outside. To light from the inside, use fountain lights. To light from the outside, use spotlights or ring light.
To make lighting the plume of water at the top of the column from the inside easier, Atlantic takes two extra steps that others don’t. First, Atlantic bores the entire column to 1.375″ in diameter, large enough to accommodate both the tubing and the light cord. Then, Atlantic opens the bore at the top of the column to a full 2″ in diameter, creating a pocket 5″ deep, where the water comes out. This larger pocket helps to buffer the jet of water shooting up from the stone and also accommodates 2″ diameter fountain lights. These fountain lights cannot be directly seen in the pocket. This gives the effect of a liquid torch at the top of the stone at night.
5.b. Optional: Install lighting
You can also combine the fountain lights with external lights. Set small spotlights at the base of the stones to shine upwards onto their sides or place a ring light in the center of the group of three columns.
If you have decided to illuminate the water flowing out of the tops of the Basalt Columns, to give an attractive “liquid torch” effect, install fountain lights before installing the plumbing.
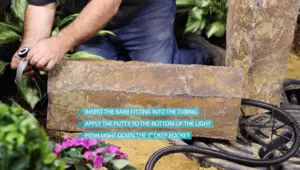
Attach the light to the fitting, gluing the light into the fitting if necessary. Thread the light cord through the column from the top out the bottom and pull the cord through, leaving the light a few inches from the top of the column. Push one end of the roll of tubing up from the bottom of the column to the top until it sticks out a few inches, then insert the barbed fitting into the tubing. Apply the included putty to the bottom of the light as shown.
Gently push the light down into the 5 inch deep pocket at the top of the column, using the other end of the tubing to press the putty firmly but gently into the pocket. Do not pull on the tubing, to avoid disconnecting the light.
Carefully stand the column up, making sure the tubing and the light cord are safely seated in the channel under the column, and not pinched.